Please find below precondition before start data migration from magento 1 to magento 2
- Set up a Magento 2 system that meets our system requirements.
- Do not start Magento 2 cron jobs.
- Make a full backup of your Magento1 store including all files, folders and the database.
Step 1: Install Data Migration Tool via Composer
Go magento2 root directory and install data migration tool using below command.
- composer config repositories.magento composer https://repo.magento.com
- composer require magento/data-migration-tool: <version>
Note :
In the above CLI command, <version> refers to the version of Data Migration Tool which must match with the Magento 2 version discovered earlier.
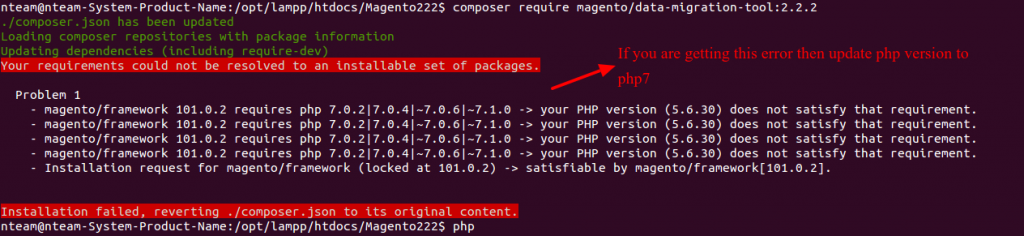
If you are getting below error then update your php version.
Step 2: Configuration of Data Migration Tool
If you want to migrate data from Magento 1 Community Edition to Magento2 Community Edition then go to following path for configuration.
- <Magento 2 root dir>/vendor/magento/data-migration-tool/etc/opensource-to-opensource.
If you want to migrate data from Magento1 Comunity Edition to Magento2 Enterprise Edition then go to following path for configuration.
- <Magento 2 root dir>/vendor/magento/data-migration-tool/etc/opensource-to-commerce.
If you want to migrate data from Magento1 Enterprise Edition to Magento2 Enterprise Edition then go to following path for configuration.
- <Magento 2 root dir>/vendor/magento/data-migration-tool/etc/commerce-to-commerce.
(1) After the installation, the following directories will contain mapping and configuration files for the Data Migration Tool:
- cd vendor/magento/data-migration-tool/etc/opensource-to-opensource/1.9.3.7(Your magento1 version).
For ex : In our scenario magento1 version is 1.9.3.7.
(2) Then change below file name of data migration tool in below directory.
(I) Go to “/opt/lampp/htdocs/Magento222/vendor/magento/data-migration-tool/etc/opensource-to-opensource/1.9.3.7” directory and the change file name from config.xml.dist to config.xml using below command.
- cd vendor/magento/data-migration-tool/etc/opensource-to-opensource/1.9.3.7(Your magento1 version).
- cp config.xml.dist config.xml
(II) Go to “/opt/lampp/htdocs/Magento222/vendor/magento/data-migration-tool/etc/opensource-to-opensource” directory and change the file name from settings.xml.dist to settings.xml using below command.
- cd vendor/magento/data-migration-tool/etc/opensource-to-opensource.
- cp settings.xml.dist settings.xml
(3) If you are using localhost then go to “/opt/lampp/etc” directory and change “max_allowed_packet” size from 1M to 50M in my.cnf file.
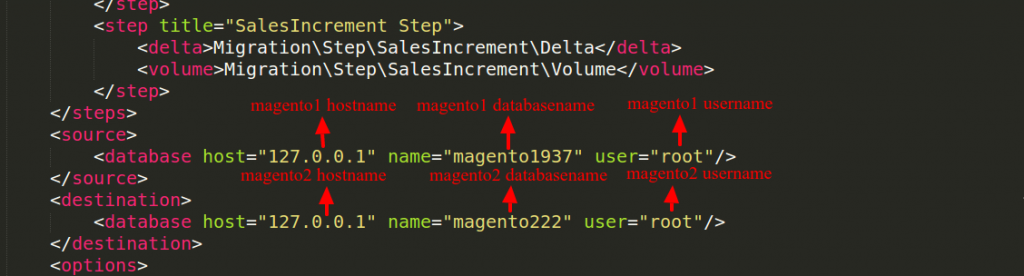
(4) Database configuration of magento1 and magento2.
Go to “/opt/lampp/htdocs/Magento222/vendor/magento/data-migration-tool/etc/opensource-to-opensource/1.9.3.7″ directory and open config.xml file.
Then change host name, database name and database user.
<source>
<database host=”127.0.0.1″ name=”Magento1-DB-name” user=”DB-username” password=”DB-password”/>
</source>
<destination>
<database host=”127.0.0.1″ name=”Magento2-DB-name” user=”DB-username” password=”DB-password”/>
</destination>
Then copy key from “/opt/lampp/htdocs/Magento1version(magento1937)/app/etc/local.xml” file and add key between Magento1-Encrypted-Key tag.
<crypt_key>Magento1-Encrypted-Key</crypt_key>
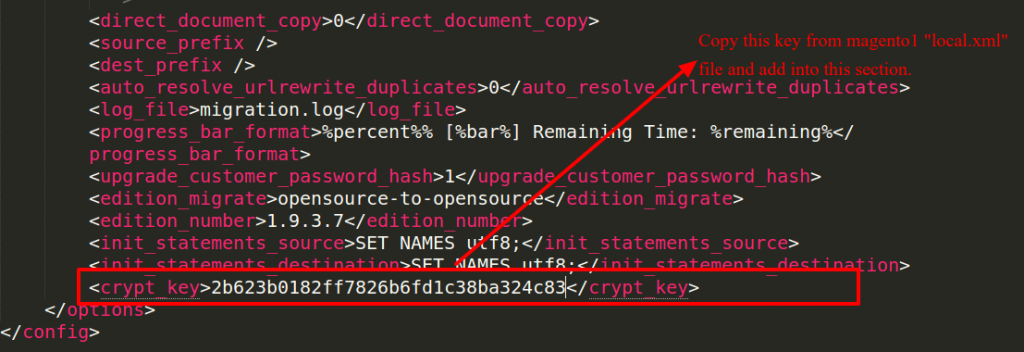
When Finished, save the config.xml and you are done!
Step 3: Start Data Migration
To start migrating the data, navigate to your Magento 2 root directory via SSH terminal and run the following commands consecutively.
(1) Migrate settings
The Settings mode migrates stores, website, and system configuration like shipping, payment, tax settings, etc. According to our data migration order, you should migrate settings first.
- php bin/Magento migrate:settings –auto vendor/Magento/data-migration-tool/etc/opensource-to-opensource/1.9.3.7/config.xml

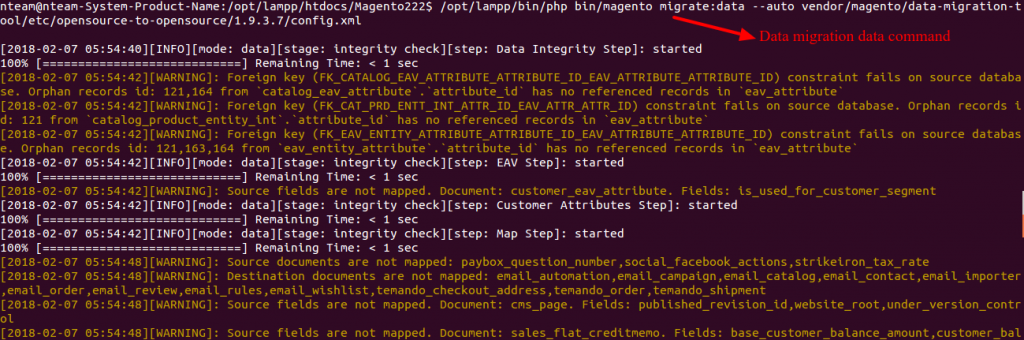
(2) Migrate data
-
php bin/magento migrate:data --auto vendor/magento/data-migration-tool/etc/opensource-to-opensource/1.9.3.7/config.xml
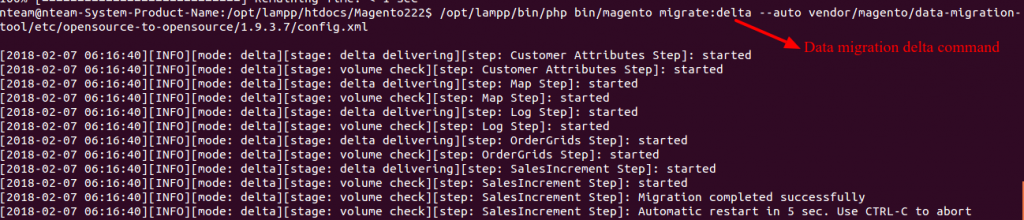
(3) Migrate changes
Incremental migration enables you to migrate only changes made in Magento1 since the last time you migrated data.
-
php bin/magento migrate:delta --auto vendor/magento/data-migration-tool/etc/opensource-to-opensource/1.9.3.7/config.xml
Step 4: Media File and Run magento 2 command
Transfer magento 1 media folder to magento 2 in “<magento2rootdirectory>/pub/media” directory and run following commands
- php bin/magento indexer:reindex
- php bin/magento cache:clean
- php bin/magento cache:flush
Once all migration processes are completed, don’t forget to test the Magento2 store completely to ensure everything functions properly.
Migrating from Magento 1 to Magento 2 isn’t just a technical upgrade—it’s a strategic move to enhance your store’s performance, security, and overall customer experience. While the transition may seem overwhelming, the right guidance can make all the difference.
At Elsner Technologies, we’re here to ensure your migration is smooth, efficient, and tailored to your business goals. As a leading Magento 2 Development Company, we provide comprehensive Magento 2 Development services—from seamless data migration to custom module development. Let us help you unlock the full potential of Magento 2 and take your eCommerce store to the next level.
Get in touch with us today and start your migration journey with confidence!