
Hey Coders, How are you? Snapkit is an Autolayout DSL for iOS Development and OS X programming, DSL stands for Domain Specific Language. Basically, It’s Like mini Language to describe Auto Layout. There is one more way to add auto layout constraints instead of elements. You can either add auto layout constraints through storyboard or Programmatically. When you add constraints programmatically then you need to create lots of code for single auto layout constraints. And when do with Snapkit then It minimized code in the small and simple language.
In order to demonstrate the power of SnapKit, we will work together with some example using SnapKit constraints system.
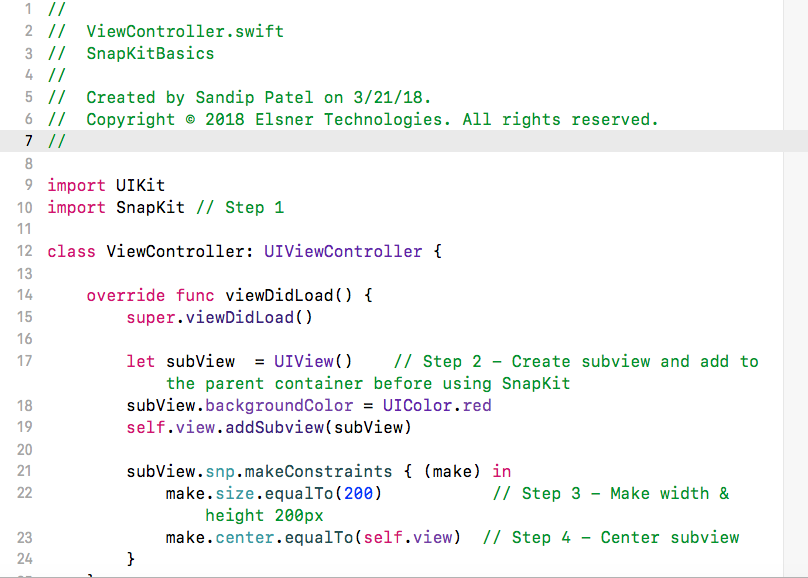
Example 1: In this, I Want to create one subView with height & width is 200. It is from the center of its parent view. First I explain to you how you can create constraints in Storyboard and programmatically with snapKit.
StoryBoard -> In below storyBoard I add 4 constraints below.
Height = 200
Width = 200
Horizontally in Container
Vertically in Container

Programmatically With SnapKit ->
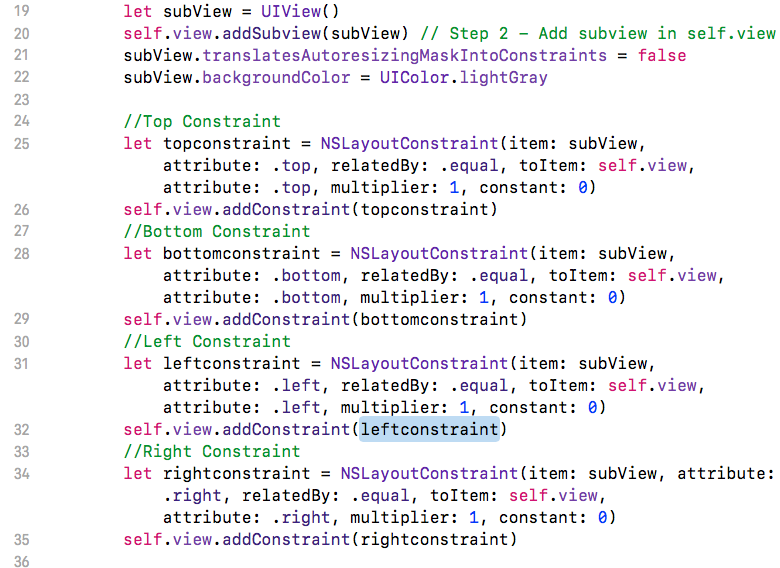
Example 2: In this Example, I want to create subView which is equal to self.View, So first I add constraint programmatically without using SnapKit. For that need to create constraints for the top, bottom, left and right separately. See below code.
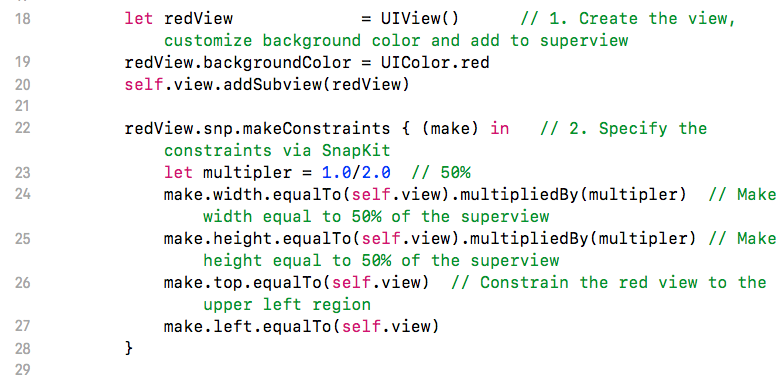
Now I add Constraint with Snapkit. You can see the difference between both codes. Just need to add constraints in one single line for all top, bottom, left and right. That’s why it’s called DSL – Most likely mini-language.

Example 3: There are a few steps to implement on the below layout in IB which makes one of the reasons why performing autolayout in IB a pain.
StoryBoard -> Now I want to create 4 equal quadrants. And if you look at the constraints in the storyboard hierarchy panel it is a mess. Now just think, if every subviews had their own component hierarchy. It will become a mess to manage all these layouts under the storyboard.

Programmatically With SnapKit -> Let’s see how to perform the same layout again but with SnapKit.
 That’s it and if you noticed how easy SnapKits syntax is. In 5 lines of code, you have just created the subview constrained to the top left and make it a quadrant. Now repeat the same steps for the remaining 3 subviews but make sure to constrain the views in the appropriate quadrant.
You can check more in this doc. http://snapkit.io/docs/ I think It makes your coding life easier