- What is multisite?
- Benefits of many sites
- One drawback of multisite
- Type of Multisite
- Subdomain-Based Multisite
- Subdirectory-Based Multisite
- Precautions before installing multisite
- Backup Your Website
- Check Hosting Compatibility
- Plan Network Structure
- Test in Staging
- User Roles
- User management in multisite
- Precautions before activating the plugin
- The process of creating a subdirectory multisite
- Migration Process for Windows
- Migration Process for Linux
- Conclusion
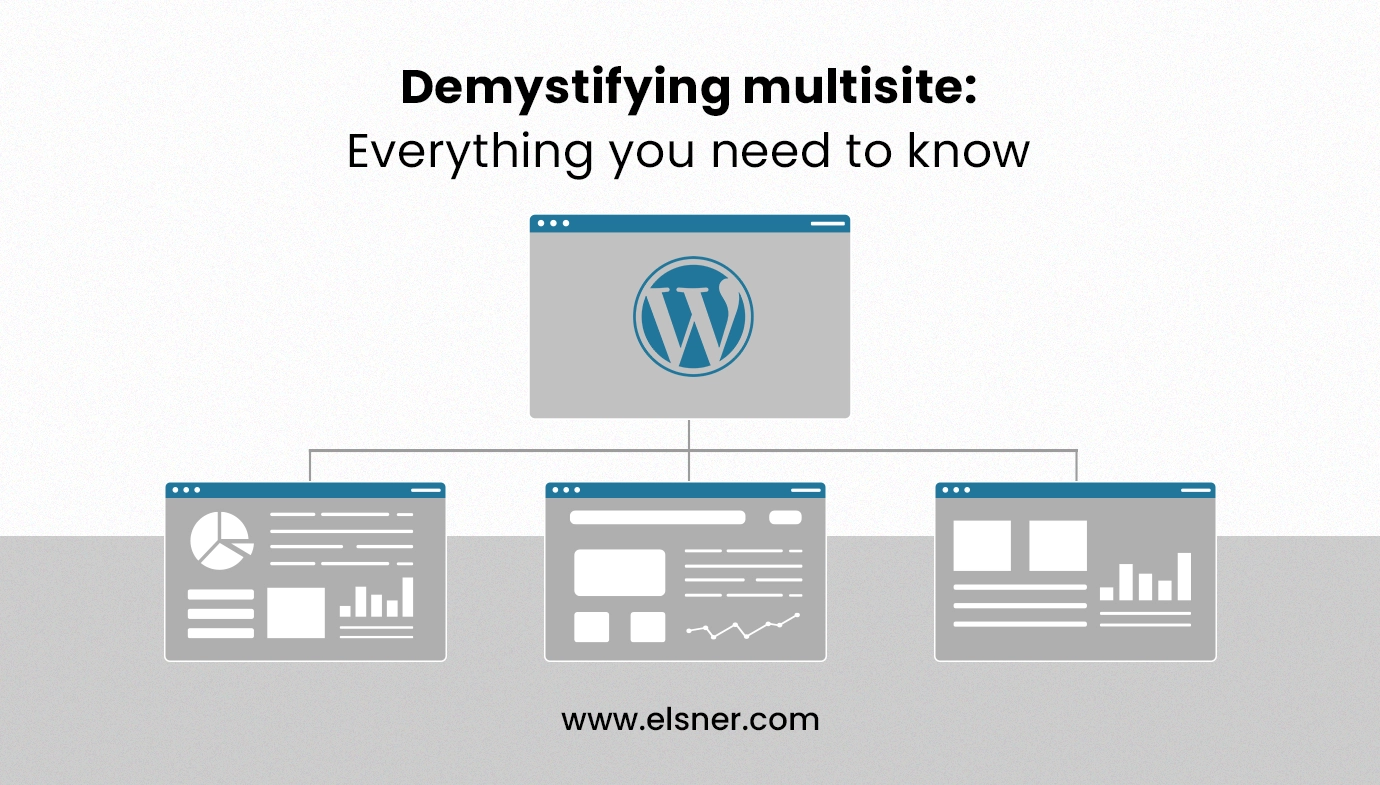
WordPress Multisite helps you manage multiple websites with a single WordPress installation. It is comparable to managing a network of linked web pages from a single location. With Multisite, you can use the same WordPress core to create and administer several websites, each with its content and layout. It’s a useful substitute for organizations, teams, or individuals who want to manage several sites without requiring separate installs for each. With centralized control, cost-effectiveness, and scalability, WordPress Multisite streamlines the management process, whether you need to run several blogs, or company sites, or give people a platform to build their websites. Another name for it is a network website.
What is multisite?
The job of managing numerous websites is made easier by the ability to administer them from a single platform. It refers to using a single WordPress installation to build and administer numerous websites.
Benefits of many sites
The benefit of using a multisite WordPress installation is that it allows you to manage several websites with a single WordPress installation, which reduces hosting costs and guarantees a uniform look and feel for all of your sites.
One drawback of multisite
Disadvantages could also include customization choices, compatibility with plugins, and specific performance issues. Furthermore, managing content isolation and security in a multisite network may be more difficult.
Type of Multisite
Subdomain-Based Multisite
Using Subdomains With WordPress Multisite, you may use a single WordPress installation to administer several websites. Each subdomain (such as site1.yourdomain.com and site2.yourdomain.com) belongs to a website within the network. When you wish to manage several related websites using a single administration and set of resources, this is helpful.
Subdirectory-Based Multisite
Assume that “example.com” is the primary domain for your website. You would like to use this domain to build several websites:
Website 1: example.com/shop is an online store.
Content: Items, shopping basket, and features for checking out
Website 2: example.com/forum is the URL of a forum
Content: Threads, user profiles, and discussion boards
Every website in this example is arranged under a subdirectory under the primary domain “example.com.” This enables you to operate and oversee various websites.
Precautions before installing multisite
Certainly, here are some simple precautions to take before creating a multisite in WordPress.
Backup Your Website
Make sure you have a database backup of your whole WordPress website before building a multisite so you can restore it in case something goes wrong.
Check Hosting Compatibility
Check that the server resources needed for multisite, such as if subdomains are being used, are met by your hosting environment.
Plan Network Structure
Decide whether to utilize subdomains or subdirectories, then stay with it because changing it can be difficult.
Test in Staging
Before deploying the multisite arrangement on your live site, try it in a staging area, if at all possible.
User Roles
Understand user roles and permissions within the multisite network. It is difficult to manage users in multisite if users are already available.
User management in multisite
Once multisite is enabled, the Admin user will have super admin status and other users must create manually.
we can create admin, editor, and other user accounts on the network website. This network site is the only one they can access.
Precautions before activating the plugin
These plugins will be considered for all sites. Please ensure this plugin has Multisite Support because some plugins create their custom table. These plugins will be considered for all sites. These plugins should be compatible with multisite.
The process of creating a subdirectory multisite
-> When creating a multisite we need to deactivate all the plugins. So We will take a screenshot for active plugins.
-> Open up wp-config.php and add this line above where it says /* That’s all, stop editing! Happy publishing. */. Put below code
/* Multisite */
define( ‘WP_ALLOW_MULTISITE’, true );
After putting the code below.
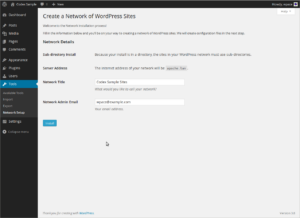
look at Administration >Tools > Network Setup.
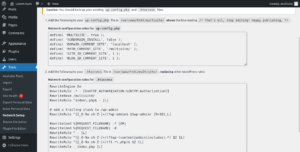
-> Open up wp-config.php and add this line above where it says /* That’s all, stop editing! Happy publishing. */. Put below code
define( ‘MULTISITE’, true );
define( ‘MULTISITE’, true );
define( ‘SUBDOMAIN_INSTALL’, false );
define( ‘DOMAIN_CURRENT_SITE’, ‘localhost’ );
define( ‘PATH_CURRENT_SITE’, ‘/multisite/’ );
define( ‘SITE_ID_CURRENT_SITE’, 1 );
define( ‘BLOG_ID_CURRENT_SITE’, 1 );
-> Put the below code to the .htaccess file
RewriteEngine On
RewriteRule .* – [E=HTTP_AUTHORIZATION:%{HTTP:Authorization}]
RewriteBase /multisite/
RewriteRule ^index\.php$ – [L]
# Add a trailing slash to /wp-admin
RewriteRule ^([_0-9a-zA-Z-]+/)?wp-admin$ $1wp-admin/ [R=301,L]
RewriteCond %{REQUEST_FILENAME} -f [OR]
RewriteCond %{REQUEST_FILENAME} -d
RewriteRule ^ – [L]
RewriteRule ^([_0-9a-zA-Z-]+/)?(wp-(content|admin|includes).*) $2 [L]
RewriteRule ^([_0-9a-zA-Z-]+/)?(.*\.php)$ $2 [L]
RewriteRule . index.php [L]
-> After putting the above code, We will be going to network setup and install multisite.
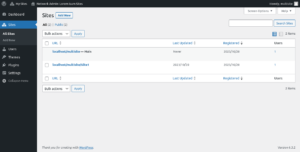
-> Process to Create a new site after installation and we can also edit site information.

-> See the below screen to edit site information
Note: Every multisite has its own blog_id. After installing the multisite {wp_prefix}blog and {wp_prefix}site and site meta table will be created. It also creates wordpress tables for multisite. If the site prefix is “wp_”. The multisite table prefix is “wp_{blog_id}” because every site has its own blog id.
Migration Process for Windows
- Extract wordpress folder to the server
- Install fresh WordPress
- Enable multisite from wp-config file
- Edit wp-config and .htaccess file as per network setup
- Upload multisite database in new database
- Change database name to wp-config.php
- In the new setup of the WordPress website, Upload all the plugins and theme files.
- Disable multisite from wp-config.php
- Install “Go Live Update Urls” plugin
- Go Live Update Urls plugin to update base URL including multisite table
- In {wp_prefix}blog and {wp_prefix}site table, Need to change domain information manually.
- In the {wp_prefix}blog table, the domain name has a subdirectory path. We need to replace only the domain name. Ex. /multisite/site1 replace with /new-multisite/site1
- We will deactivate all the activated plugins.
- Enable multisite from wp-config.php
- Then the Network activates the required plugins.
Migration Process for Linux
- Extract wordpress folder to the server
- Give full access permission to the folder
- Install fresh WordPress
- Enable multisite from wp-config file
- Give full access permission to the folder
- Edit wp-config and .htaccess file as per network setup
- Upload multisite database in new database
- Change database name to wp-config.php
- In the new setup of the WordPress website, Upload all the plugins and theme files.
- Disable multisite from wp-config.php
- Install “Go Live Update Urls” plugin
- Go Live Update Urls plugin to update base URL including multisite table
- In {wp_prefix}blog and {wp_prefix}site table, Need to change domain information manually.
In the blog table, the domain name has a subdirectory path, We need to replace only the domain name. Ex. /multisite/site1 replace with /new-multisite/site1
- We will deactivate all the activated plugins.
- Enable multisite from wp-config.php
- Then the Network activates the required plugins.
Conclusion
In conclusion, implementing a multisite in WordPress can be a Powerful Solution for managing multiple websites under a single installation. However, this approach requires careful planning and consideration of various aspects.