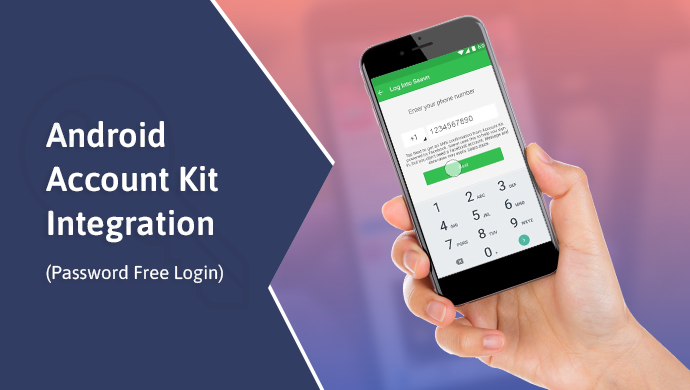
Nobody is really fond of remembering passwords because at some point in our life we tend to mix them and due to security reasons we are unlikely to use same passwords everywhere. So what can be a better way of keeping the account safe as well as hassle-free from passwords? Facebook has a solution for that, Account Kit is a product which lets users register or log in to some apps by using just their phone numbers or email addresses without the use of passwords.
It’s easy to use and it does not need a Facebook account to log in and it’s available for over 230 country codes and in over 40 languages also being available for Android, iOS and web.
Let’s see what steps need to be followed for Android Account Kit integration.
1) Add or create an app on https://developers.facebook.com/
2) From project dashboard, click on “+” buttons near PRODUCTS and select Account Kit. You will find Account Kit under PRODUCTS now. Click on settings and get started.
3) There you will find Account Kit Client Token that needs to be added in our app. Enable Client Access Token Flow should be set to Yes, so that app can receive token directly without addition server. You can select SMS Templates from the given. Email Settings for colors can be done from there.
4) From Settings > Basic in left panel add android app by adding Google Play Package Name and Key Hashes. Here is guidance to generate key hash for Development and Release app. Make sure your App Status is live on the top bar. Click on Save Changes. Console settings are now done.
Let’s take the integration to the coding level
5) Add dependency to your project.
repositories {
jcenter()
}
dependencies {
implementation 'com.facebook.android:account-kit-sdk:4.+'
}
6) Inside you AndroidManifest.xml
lt;uses-permission android:name="android.permission.INTERNET"/>
7) Add these details to strings.xml
<string name="FACEBOOK_APP_ID">YOUR_FACEBOOK_APP_ID</string>
<string name="ACCOUNT_KIT_CLIENT_TOKEN"> [YOUR_ACCOUNT_KIT_CLIENT_TOKEN] </strin
8) Add this to the AndroidManifest.xml inside application tag. The AccountKitActivity must be defined here. We can add a custom theme for AccountKitActivity which can be found here and demo file can be found here. Facebook app events are enabled by default that we can disable by making value false.
<meta-data android:name="com.facebook.sdk.ApplicationId"
android:value="@string/FACEBOOK_APP_ID" />
<meta-data android:name="com.facebook.accountkit.ClientToken"
android:value="@string/ACCOUNT_KIT_CLIENT_TOKEN" />
<activity
android:name="com.facebook.accountkit.ui.AccountKitActivity" />
<meta-data android:name="com.facebook.accountkit.FacebookAppEventsEnabled"
android:value="false"/>
<meta-data android:name="com.facebook.accountkit.ApplicationName"
android:value="@string/app_name"/>
9) Checking for existing sessions.
import com.facebook.accountkit.AccountKit;
import com.facebook.accountkit.AccessToken;

AccessToken accessToken = AccountKit.getCurrentAccessToken();
if (accessToken != null) {
//Here we will handle already logged in users
} else {
//Here we will handle new or logged out users
}
10) Add SMS login with LoginType.PHONE and Email login with LoginType.EMAIL.
import com.facebook.accountkit.AccountKit;
import com.facebook.accountkit.ui.AccountKitActivity;
import com.facebook.accountkit.ui.AccountKitConfiguration;
import com.facebook.accountkit.ui.LoginType;

public static int APP_REQUEST_CODE = 23;

public void accountKitPhoneLogin() {
final Intent intent = new Intent(mContext, AccountKitActivity.class);
LoginType loginType;
loginType = LoginType.EMAIL; //For Email login
loginType = LoginType.PHONE;//For SMS login
AccountKitConfiguration.AccountKitConfigurationBuilder configurationBuilder =
new AccountKitConfiguration.AccountKitConfigurationBuilder(
loginType,
AccountKitActivity.ResponseType.CODE);
//Add your UIManager here
//configurationBuilder.setUIManager(uiManager);
intent.putExtra(AccountKitActivity.ACCOUNT_KIT_ACTIVITY_CONFIGURATION,
configurationBuilder.build());
startActivityForResult(intent, APP_REQUEST_CODE);
}
11) Handling the response we get from Account Kit.
import com.facebook.accountkit.AccountKitLoginResult;
@Override
protected void onActivityResult(
final int requestCode,
final int resultCode,
final Intent data) {
super.onActivityResult(requestCode, resultCode, data);
// confirm that this response matches to your request
if (requestCode == APP_REQUEST_CODE) {
AccountKitLoginResult loginResult = data.getParcelableExtra(AccountKitLoginResult.RESULT_KEY);
String message;
if (loginResult.getError() != null) {
message = loginResult.getError().getErrorType().getMessage();
goToErrorActivity(loginResult.getError());
} else if (loginResult.wasCancelled()) {
message = "Login cancelled by user!";
} else {
if (loginResult.getAccessToken() != null) {
message = "Success:" + loginResult.getAccessToken().getAccountId();
} else {
message = String.format(
"Success:%s...",
loginResult.getAuthorizationCode().substring(0, 10));
}
// Success!!! Start next activity…
goToLoggedInActivity();
}
Toast.makeText(this, message, Toast.LENGTH_LONG).show();
}
}
That’s it, the process is as simple as it seems and finally you can run this app and using account kit.
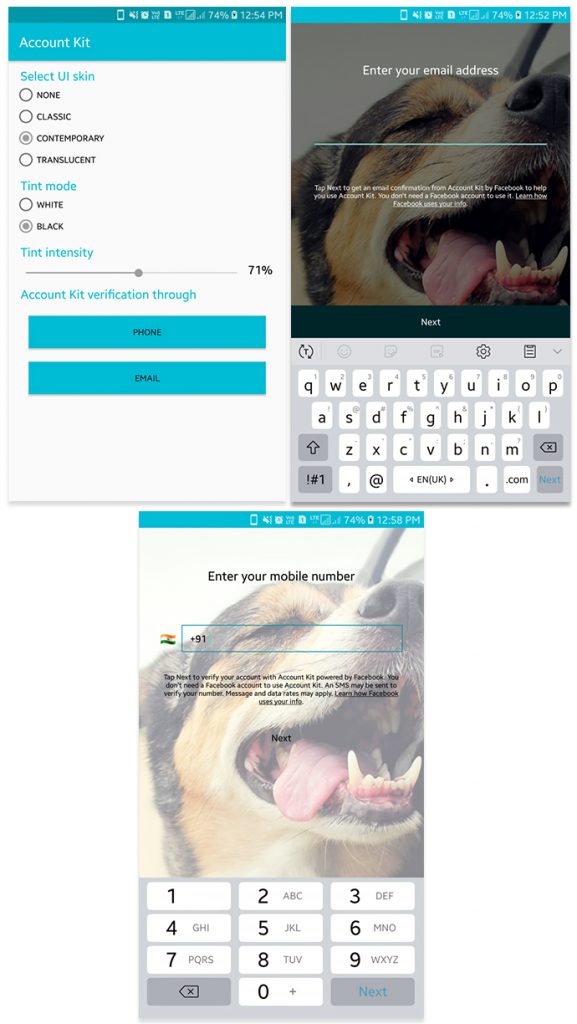
I have created demo app for that, which can be found on this repo. Here are some of the screenshots from app.